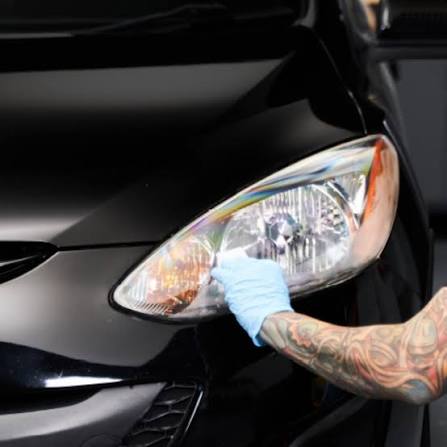
Dull headlight lenses can reduce the amount and quality of light reaching the road while making the front of a vehicle look neglected. Plastic lenses commonly become cloudy or yellow as their outer protective surface ages. Restoration can improve many lenses, but lasting results require protection after polishing.
Why Plastic Headlights Become Cloudy
Most modern headlight assemblies use durable plastic lenses rather than glass. Sunlight, heat, road debris, chemicals, and weather gradually affect the exterior surface.
Yellowing often develops as the original UV-resistant coating deteriorates. Internal moisture or damaged reflectors, however, cannot be corrected by polishing the outside of the lens.
Check Whether the Haze Is Inside or Outside
Run a clean hand over the exterior after washing. Roughness and visible exterior oxidation suggest restoration may help. Condensation behind the lens points to a sealing or housing problem instead.
Clean and Inspect Before Sanding
Wash the headlights and surrounding bodywork thoroughly. Dirt left on the lens can produce deeper scratches once abrasive restoration begins.
Owners comparing exterior maintenance ideas through car care resources should protect nearby painted surfaces before using abrasives. Masking around the lamp can reduce accidental contact with paint or trim.
If the assembly is cracked or collecting water, address that defect rather than relying on polishing.
Restore the Damaged Outer Surface
Moderate oxidation may respond to polishing, while heavily degraded lenses can require progressive wet sanding followed by polishing. Each abrasive stage should remove the marks created by the previous stage.
A range of automotive maintenance information discusses headlight restoration methods, but skipping abrasive stages can leave persistent haze. Follow the restoration product’s instructions carefully.
| Lens Problem | Possible Method | Main Limitation |
|---|---|---|
| Light haze | Plastic polish | Protection still needed |
| Yellow oxidation | Sand and polish | Requires careful technique |
| Deep cracking | Assembly replacement | Restoration may not last |
| Internal condensation | Seal diagnosis | Exterior polishing won’t help |
Reapply UV Protection After Restoration
Removing oxidation often removes some or all of the remaining factory protective layer. Leaving freshly polished plastic unprotected can allow cloudiness to return sooner.
People reviewing DIY ideas on broader online media may see temporary household remedies promoted as permanent fixes. A suitable automotive UV-resistant coating or restoration system is generally a more purposeful finishing step.
Allow the protective product to cure as directed before washing or exposing the surface unnecessarily.
Shortcuts That Often Produce Poor Results
Toothpaste and other mild household abrasives may change the appearance of lightly hazy lenses, but they aren’t complete restoration systems. They typically provide limited correction and no dedicated long-term UV protection.
Another mistake is using coarse abrasive paper without working progressively toward finer grades. Deep sanding marks can become harder to remove than the original oxidation. Restoring a severely cracked or internally damaged housing can also waste time when replacement is the more sensible solution.
Frequently Asked Questions
How long does headlight restoration last?
Durability depends heavily on preparation, UV exposure, climate, and the protective coating used afterward. Restoration without renewed UV protection commonly deteriorates sooner than a properly sealed repair.
Can cloudy headlights reduce nighttime visibility?
Severe oxidation can scatter or block part of the light produced by the headlamp. Restoring optical clarity may improve usable light when the bulb, reflector, alignment, and electrical system are otherwise functioning correctly.
Should badly damaged headlights be restored or replaced?
Restoration is useful for exterior oxidation. Replacement becomes more reasonable when lenses are deeply cracked, housings leak repeatedly, mounting points are broken, or internal optical components have deteriorated.
Finish the Job With UV Protection
Removing haze is only half of a good headlight restoration. First confirm that the damage is external, correct the oxidized surface gradually, polish it clear, and then replace the lost UV protection. When deterioration is internal or structural, repairing or replacing the assembly is more effective than repeatedly polishing the outside.